How-to: Blackwing Labs 07.29.21 Non-Photo Blue Editing Tutorial
Our second installment in the Blackwing Labs series, the Blackwing Lab 07.29.21 features a non-photo blue core that doesn’t show up on scanners or photocopiers. Non-photo also called non-repro blue pencils are an essential tool for artists and illustrators. When sketching or laying down lines with a non-photo blue pencil, the artist does not have to erase any blue marks before applying ink directly to the paper. The lines done in non-photo blue will disappear or considerably dissipate when scanned in, resulting in a finished or near-finished product.
In this tutorial, we show you how to correctly scan your images as well as how to import and edit your image in Photoshop to make sure you end up with a clean final product.
Step 1: Make sure your scanner/copy settings are correct. For best results, choose the “Scan to Bitmap” option if available. (Some scanners/copiers may call this a “Text” or “Black & White” option.)
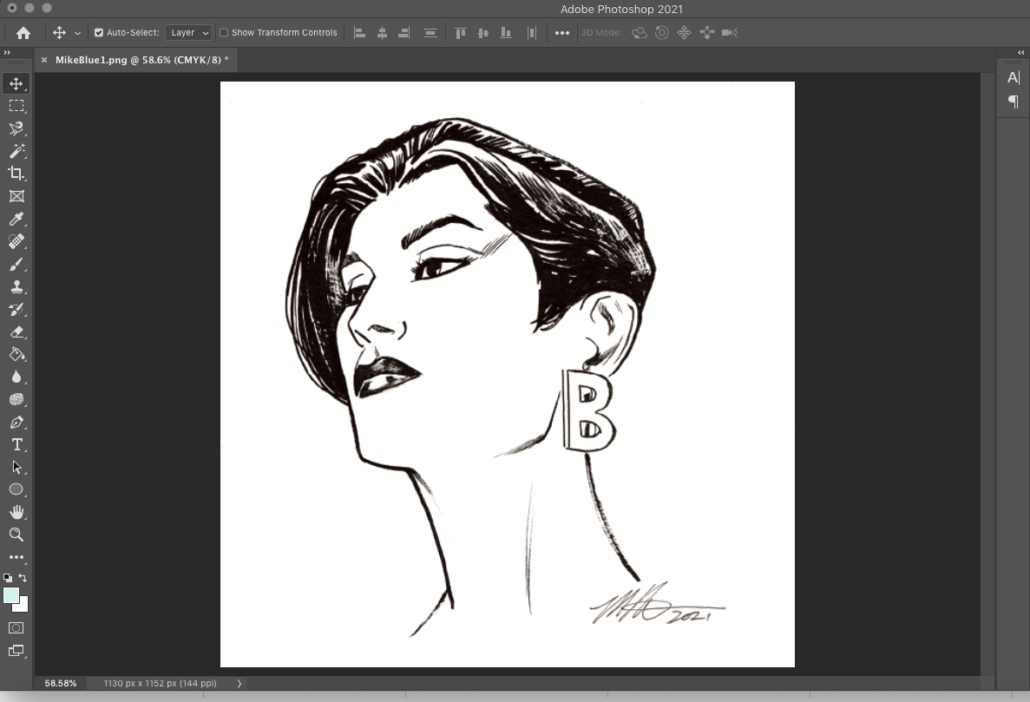
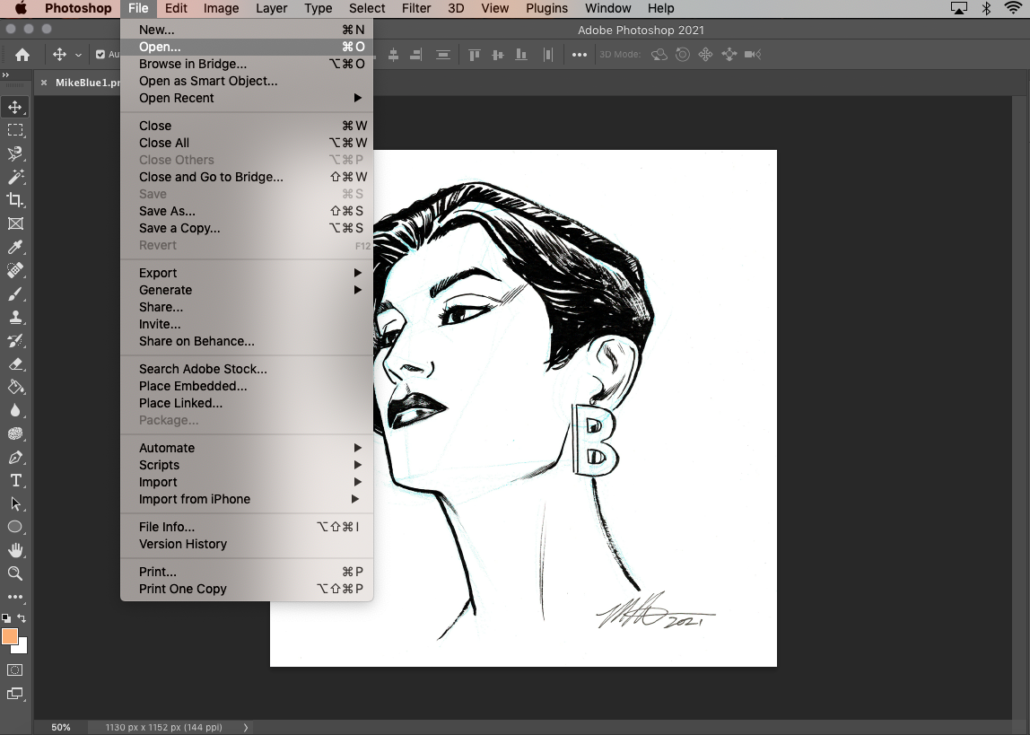
Step 2: If there are still traces of blue in your scanned image, follow the next steps to clean up your image. Start your Photoshop application and proceed to File > Open your image to import it. You may still see traces of non-photo blue at this point.
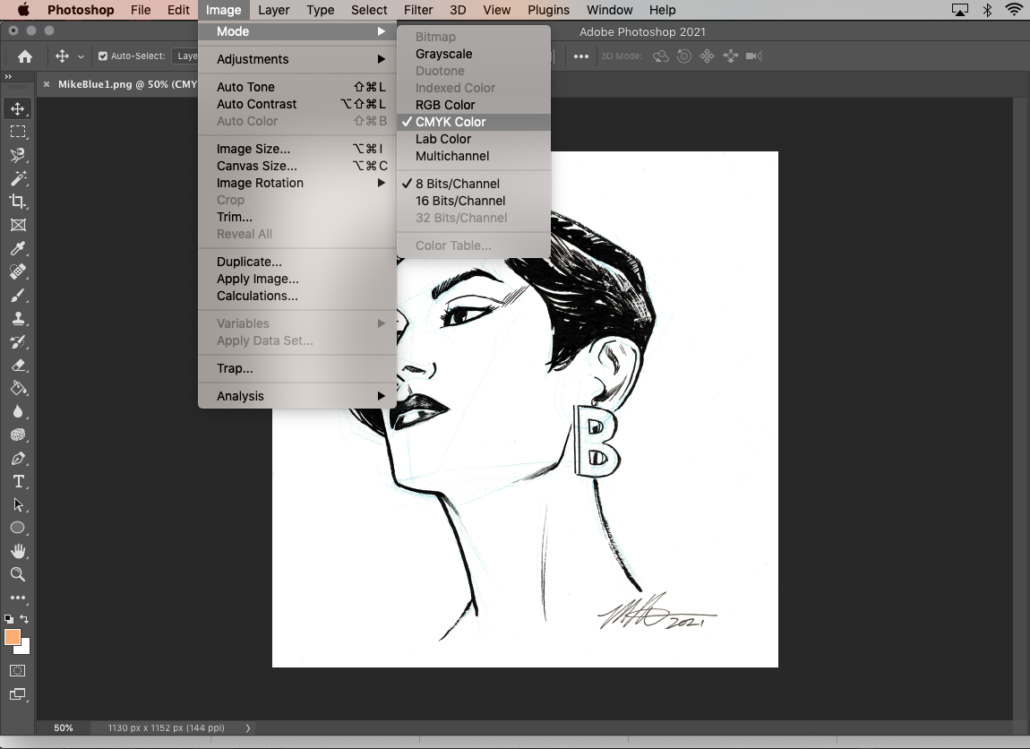
Step 3: Now, go to Image > Mode > and select CMYK Color to change your image’s color profile to CMYK.
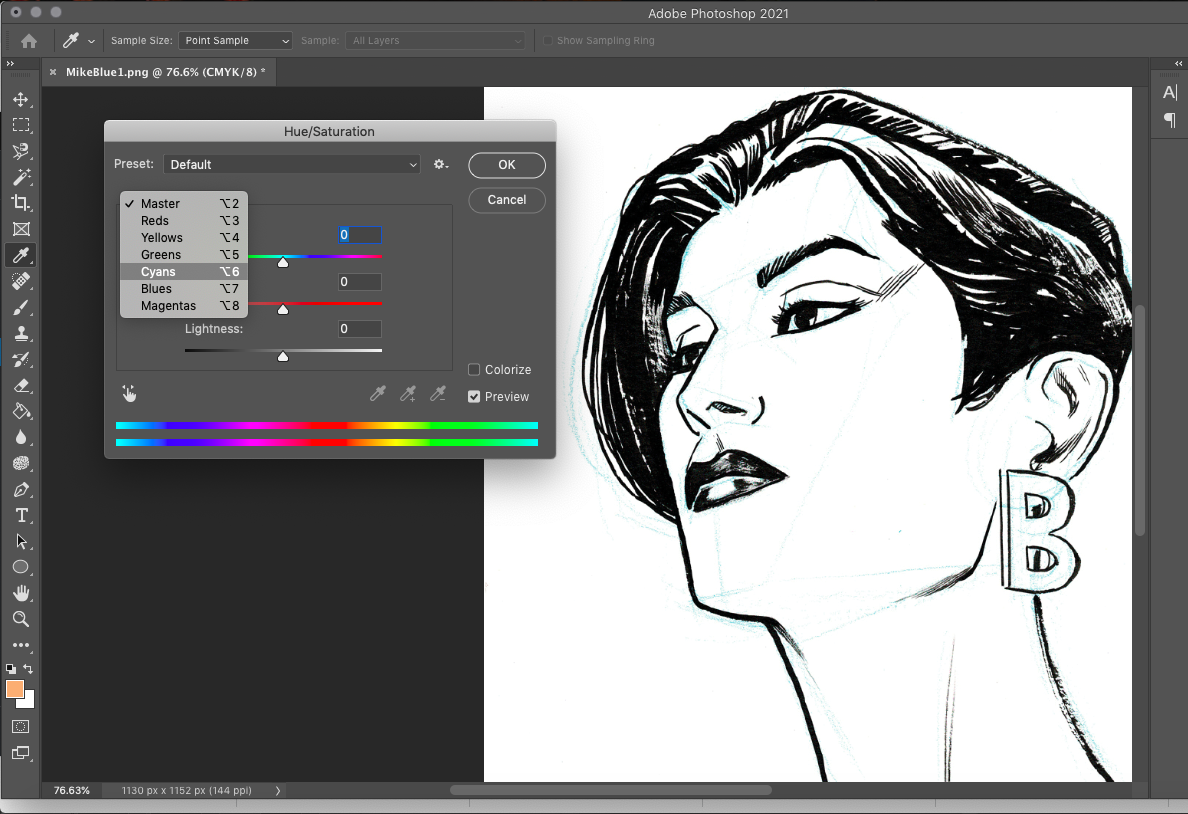
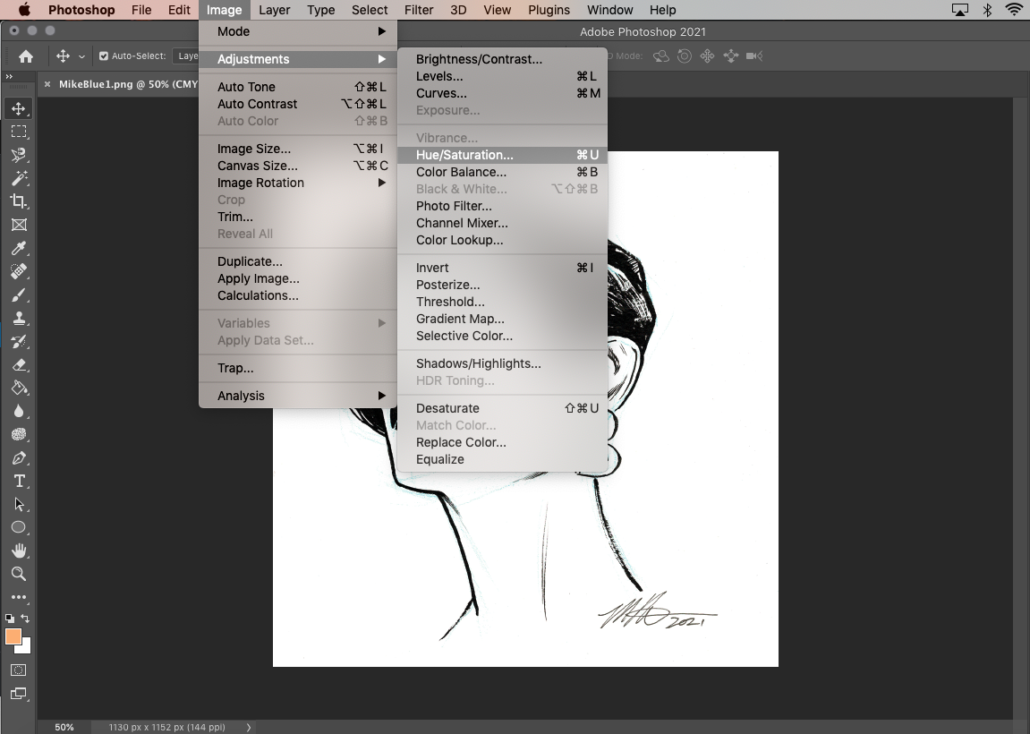
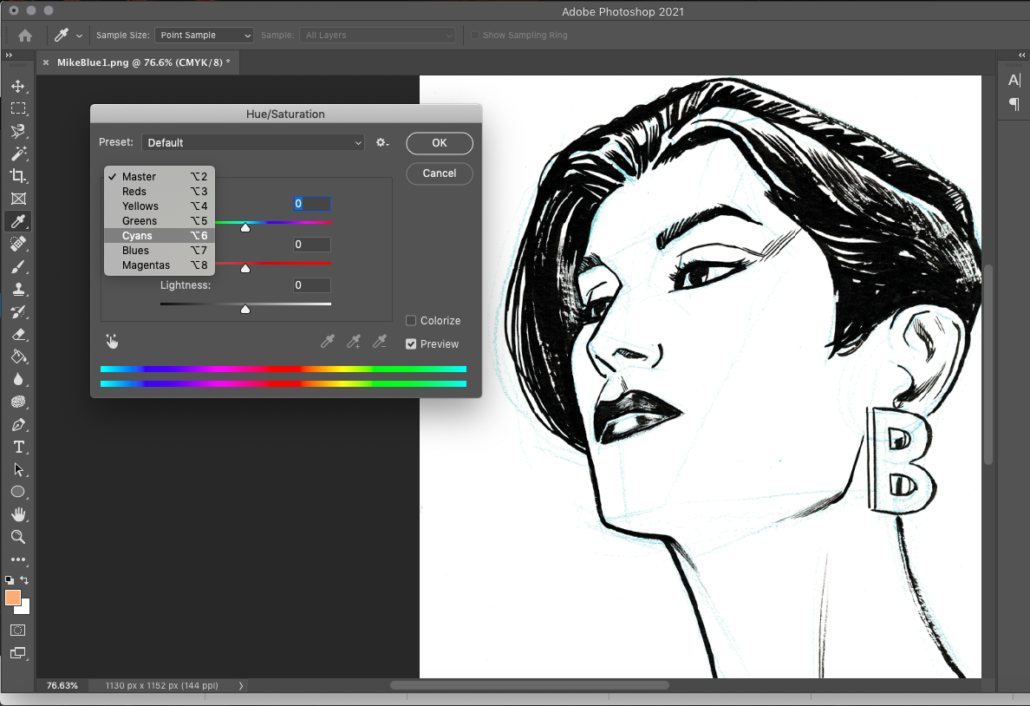
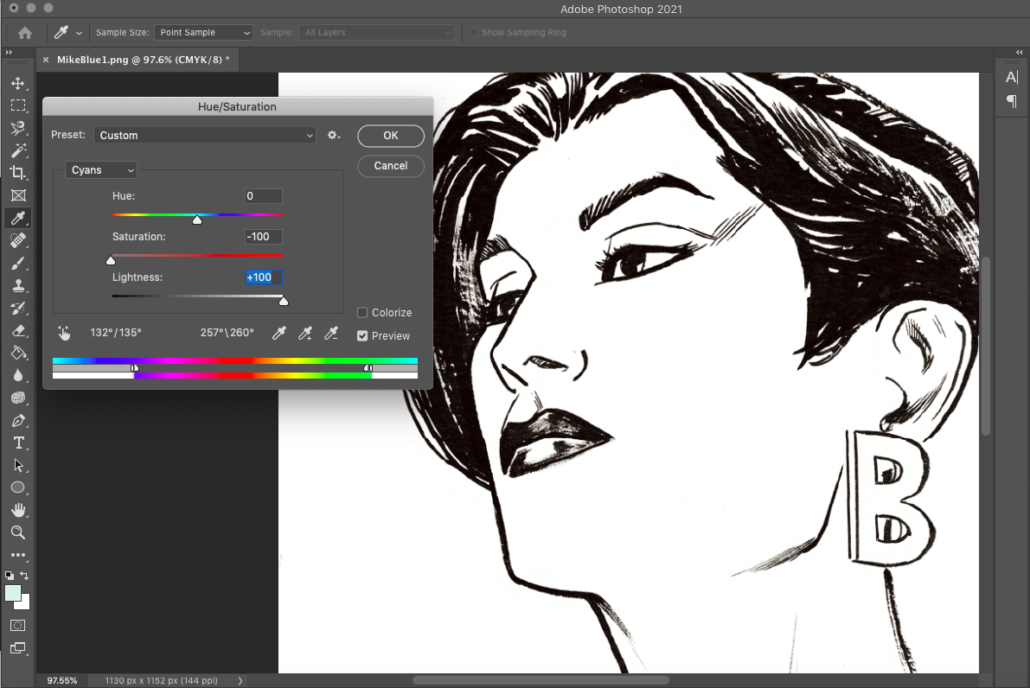
Step 4: From here, go to Image > Adjustments > Hue and Saturation to open up the slider adjustment menu. In the pop-up, go to the Master dropdown menu and select Cyans.
Step 5: With the Cyans selected, make sure all of your adjustment values are as shown.
– Saturation is set to -100
– Lightness is set to +100
– The values above the color scale at the very bottom are set to around 130° and 255° to encapsulate all blue hues.
Step 6: Save your brand new image that no longer contains your non-photo blue sketch lines!
